
Hunter S. Thompson spoke into the love of basketball, and his words are worth reminiscing today. At some point, he said, ‘I am more than just a serious basketball fan. I am a long-life addict, as I got addicted from birth.’ These words highlight how valuable basketball hoop is, and perhaps, why you should get yourself an outdoor basketball hoop.
Having an outdoor basketball hoop will often be one of the best things you could ever consider. This hoop provides you with the opportunity to not only have fun and bond with family but also keep fit. However, what matters most is how great your outdoor basketball hoop is. Here are a few insights into how to get the best outdoor basketball hoop and how to make a homemade outdoor basketball hoop.
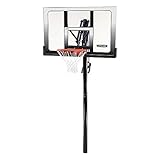
What is the Best Outdoor Basketball Hoop?
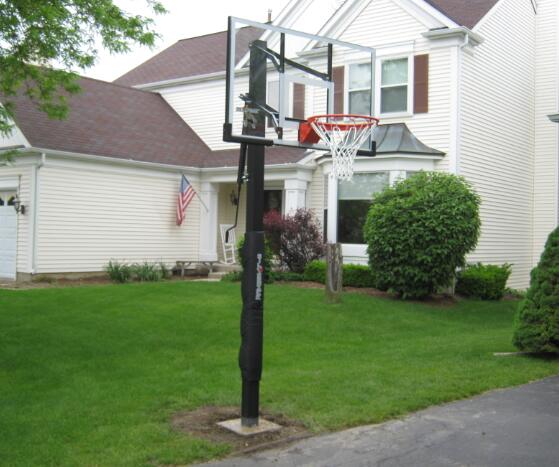
- PRO-STYLE LOOK AND PERFORMANCE — Premier in-ground basketball goal offers the performance of gymnasium-style goal
- OPTION TO UNBOLT AND MOVE GOAL — Anchor mounting offers the strength of concrete and the option to unbolt and move goal. Anchor Kit included.
- RIM FLEXES UNDER PRESSURE — Tempered glass backboard and pro-style breakaway rim that flexes under pressure
- POWDER-COATED PROTECTION — Powder-coated steel pole height adjusts from 7.5' to 10' with all-steel actuator
- LIMITED WARRANTY — Product is backed by a 5-year limited warranty and includes backboard pad and pole pad
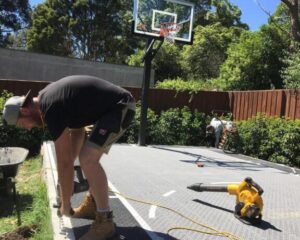
How to Install an Outdoor Basketball Hoop
Various factors go into the proper installation of an outdoor basketball hoop. It will suffice to mention that most outdoor basketball hoops are in-ground, and that should be our focus. Usually, you will need to follow the following steps.
• Pick an ideal spot
Take the time to pick a suitable location for the installation of this outdoor basketball hoop. Such will be the time to study whether the given site has utility lines running through it. As such, you might need to call the relevant authorities for confirmation. Besides that, you will have to check whether there are ordinances that restrict the installation of basketball hoops. Once you get a green light, you will be good to go.
• Dig a hole
Once you get a go-ahead, you will need to dig a hole in which to insert the pole. The standard depth for you to dig will be about 24 to 48 inches. Feel free to go further than this, as this will assure you of enhanced stability. Also, you will need to consider to make the hole around 24 inches.
While at it, ensure that the formed walls are leveled. As long as these walls are not level, you will end up with cracks between the walls and the concrete.
• Pour concrete into the hole
Ensure that you hold the pole straight as you pour the concrete around it. It is advisable that you keep agitating the concrete when pouring this concrete, as this will help in removing any pockets of air.
You will also need to spare some time to smooth the surface once you are done. That will be the best time to remove any excess concrete, preferably, using a trowel. Before you let it dry, ensure that your pole is neither leaning nor shifted. After that, you will leave it for between 24 and 48 hours to dry.
• Raise your pole
This step comes in handy for hoops that come with a mounting anchor, as it will need assembly before raising it. Ensure that you assemble the lift mechanism as well as the support arms. However, remember to take the necessary safety precautions such that you do not end up being vulnerable to this heaviness. Take the time to secure all the nuts and bolts too.
• Fix your backboard
The process of fixing your backboard is relatively straightforward. Usually, you will need to follow the instructions provided in your user manual during this time. It will also be vital to handle this step with the help of other people, as the backboard could be relatively heavy for you. Ensure that all the nuts are in place and securely so.
• Install the rim
All you will need to do in this step is to make sure that you bolt the rim onto the backboard. Once this rim is in place, you will be free to loop your chosen net around it.
How To Make A Homemade Outdoor Basketball Hoop?
Indeed, considering DIY basketball hoop will often be one of the best moves. It is not only affordable but also relatively straightforward to make. The use of a wire hanger in making your hoop will come in handy for you. Here are the steps you will need to observe.
• Have all the materials together
Usually, you will need to focus on a 12mm thick metal that is not only thick but also big enough to offer you the experience you desire. It will also be necessary for you to get cardboard, a pair of scissors, and a cutter. Ensure that you get strings and paint too.
• Cut the metal ring accordingly
This step involves cutting the 12mm thick metal at one end up to where it reaches the hook. Using your pliers, bend the wire into a perfect circle.
• Time for the backboard now
Take the time to cut the cardboard into the desired fit, as this is what forms your backboard. As long as it remains proportional to the hoop, you will be good to go. For instance, if you have an 18-inch basketball hoop, the backboard will be about six feet. However, the standard dimensions for you to consider will be 44*28 inches.
Ensure that you paint or mark your backboard accordingly before proceeding to the next step.
Recommended 44 Inch Backboard Basketball Hoop

- Enjoy the game at your level without the use of any tools! The telescoping pole adjusts the rim height from 7.5 to 10 feet in 6-inch increments.
- The Shatterproof Fusion Backboard integrates a shatterproof polycarbonate playing surface with an unbreakable polyethylene frame for a durable, pro-glass look. Graphics are screen-printed with UV-protected inks for superior color and protection.
- The 3 pc. round steel pole is protected with a powder-coated, weather-resistant finish. The system is supported by a heavy duty portable base. Just fill with sand or water and play today. No cement required!
- The original classic basketball rim! The Classic Rim features a 5/8-inch solid-steel ring supported by 1/2-inch braces and an all-weather net.
- 44 in. x 30 in. x 2 in. Shatterproof Fusion Backboard
• Attach the metal hook to the backboard
Mark a place on the backboard where the basketball hook will go through. Cut enough space to allow it to pass through and secure it with a tape at the back.
• Make the net
With the use of yarn or strings, come up with a net that meets your preferences. You are now free to weld it on your pole.
What To Fill Outdoor Basketball Hoop?
Undoubtedly, the stability of your portable outdoor basketball hoop will often be dependent on how stable the base is. It is for this reason that you should give the bottom the attention that it so deserves. Usually, filling this support will come in handy in enhancing the sturdiness of the basketball hoop in the long run. But what should you use?
Most often, people will choose between sand and water when deciding on what to fill the base. The choice is dependent on what one prefers or can access more comfortably. Here are a few insights into these two options.
• Sand
That sand is denser than water is no secret. Usually, its density is as high as almost 1.5 times that of water. With enhanced density, you are confident of enhanced stability in the long run. Additionally, sand makes it hard for you to move the system around. However, some people will find sand to be relatively expensive.
• Water
If you are looking for a more affordable option, water will be your ideal choice. Unfortunately, the stability it offers is way lesser than that of sand. On top of that, it will hardly be suitable for those in freezing regions, as it will end up forming cracks at the base.
How To Tighten The Backboard Of Your Outdoor Basketball Hoop?
You can hardly overlook the significance of a stable basketball hoop when playing. And having a securely fit backboard should always be the starting point. Usually, it will be right to ensure that this backboard is securely fitted on the pole. But what should you prioritize at this time? Make sure that you observe the following.
• Secure the nuts
Undoubtedly, unless you pay attention to the nuts and bolts that the backboard comes with, you will end up with one of the most unfortunate experiences in the long run. Take the time to secure these nuts using a wrench. Further, it will be right to consider checking whether there is any loose nut from time to time. It is through this that you will avoid any problem on time.
• Fit it accordingly
Different manufacturers usually indicate how to install backboards. It will help if you observed all the instructions and guidelines that they tend to provide. This way, you will be confident of not only the stability but also the reliability of the basketball backboard. As long as you follow the guidelines as indicated, there are better chances of getting a stabler one at the end of the day.
• Weld it on the pole
Have you thought about welding the backboard on your outdoor basketball pole? While this is hardly the first choice for you, it will always be worth considering at any time. Welding the backboard here will guarantee you of enhanced stability at all times. However, this will happen if the board used is metal.
What Should You Use To Weigh Down The Basketball Hoop?
Indeed, weighing down your basketball hoop will be definitive of how much stability you enjoy in the long run. With the right materials used, you will be sure of the best results.
Most people tend to rely on the water when weighing down their portable outdoor basketball hoops. This water will also come in handy in improving both safety and performance. Thanks to how accessible and affordable water is, this will be a priority for you.
You could also consider the use of sand, which boasts of enhanced density and improved stability. With this option, you will comfortably identify cracks whenever they arise, which means that it allows you to take necessary remedial steps on time.
One other option you will find worth exploring is the use of portable bases polymer. This product will effortlessly absorb up to 400 pounds, which is enough to give you the stability you so desire. Besides, its affordability will appeal to you almost instantly.
How To Winterize An Outdoor Basketball Hoop?
Some times winterizing your basketball hoop becomes inevitable. You could do this with either the basketball hoop remaining in position or after taking down this hoop.
This process involves first tightening the loose nuts and applying a rust converter to rusted points. Take the time to remove any loose paint and then repaint the particular surface. From here, you will use either sand or water to secure the base.
Indeed, water will always expand whenever it is cold out there. It is for this reason that adding anti-freeze will come in handy for you. However, do not use too much anti-freeze, as it could damage the material at the base.
On the other hand, you could fill your base with sand. Always aim at using the right amount of sand since the quantity matters a lot.
So, how do you avoid many problems? Here are the steps you will need to follow.
• Drain all the water within the base. Unless you drain this water from time to time, you will end up with cracks all over
• Have the hoop under a cover, for instance, a barn
• If your hoop is usually open, ensure that you keep protecting the net at all times
How To Dismantle Outdoor Basketball Hoop?
If you are looking forward to disassembling your hoop, the process is relatively simple. Here are the few steps that you will need to consider in this process.
• Take the time to remove the net, rim, and backboard in that order. Usually, you will have to remove all the accessories and remain with the pole only
• Check if there are any buried utility lines before you start digging. If there are any, call the relevant authorities to handle them.
• Now is the time for you to clear the area and dig to the bottom of the pole. Most often, the depth will range between 2 and 2.5 feet.
• Rock the pole back and forth until it is loose enough
• Take the pole to the ground
• You can finalize by removing the concrete
How To Install A Net On An Outdoor Basketball Hoop?
Usually, all you will need in this step is the hoop and the net. And well, your hands. Here are the steps for you to follow.
• Confirm which side of the net is ideal for you to fix
• Push the net loop through the rim hook and attach it there
• Repeat the step above on all the remaining net loops
• Pull the net until it is tight
In conclusion, having an outdoor basketball hoop will always be one of the most invaluable things for you. As long as you understand how to install and even disassemble it, there is no reason for you to worry. Are you ready to get yourself this hoop? Now is the time to get to the yard!
Picking Best Outdoor Basketball Hoops


Look More On: