
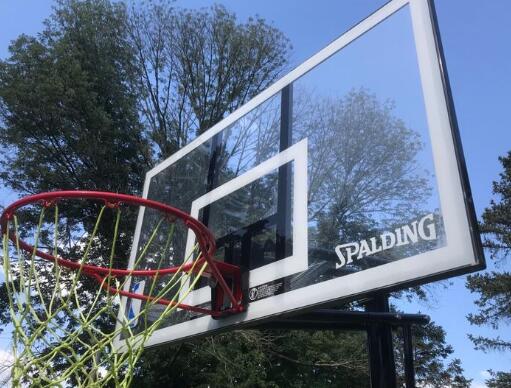
Indeed, you can hardly ignore the role of a brand in determining how long a basketball hoop will last. It is at this point that Spalding steps in, as it is not only reputable but also among the most reliable brands. Installing their hoop will often be one of the best decisions one can ever make. However, the big concern is whether you will comfortably fit an inground Spalding hoop.
Various aspects go into adequately installing your Spalding inground basketball hoop. As long as you are conversant with these variables, you will have no reason to worry. They will include the following.

The Best Recommended Spalding Inground Basketball Hoop That Worth Buying
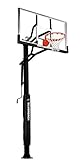
- PRO-STYLE LOOK AND PERFORMANCE — Premier in-ground basketball goal offers the performance of gymnasium-style goal
- OPTION TO UNBOLT AND MOVE GOAL — Anchor mounting offers the strength of concrete and the option to unbolt and move goal. Anchor Kit included.
- RIM FLEXES UNDER PRESSURE — Tempered glass backboard and pro-style breakaway rim that flexes under pressure
- POWDER-COATED PROTECTION — Powder-coated steel pole height adjusts from 7.5' to 10' with all-steel actuator
- LIMITED WARRANTY — Product is backed by a 5-year limited warranty and includes backboard pad and pole pad
Tips on How to Install Spalding Inground Basketball Hoop
As mentioned, you will need to invest a lot in pre-planning where to install your adjustable Spalding basketball hoop. It is through this that you will be confident of getting the ultimate experience at the end of the day. Here are the steps to follow.
• Find the right location
Take the time to find a suitable place for you to install this basketball hoop. Most often, you will have to look for a flat surface and a place where you will freely move. Perhaps, such will be the time to go through the ordinances that affect your neighborhood, let you end up making mistakes.

• Dig a hole and pour concrete
Once you identify a perfect place to install your hoop, you will need to dig a hole and pour enough concrete. Remember, most Spalding hoops are adjustable, and they will require you to be careful about how much concrete to pour. Leave enough room at all times.
• Raise your pole
The next step will often involve the assembly of your mounting anchor. It is after this that you will then fix the lift mechanism as well as the support arms as directed in the user manual. Most often, it will be vital to consider the involvement of other people, as raising the pole could be relatively hard for one person.
• Check the height of the pole
One of the things that people tend to overlook is the height of the pole, which is wrong. The hoop needs to be precisely the height recommended in relation to the surface. Unless this is so, you will end up with a compromised experience in the long run. Remember, there is zero room for error when it comes to fixing Spalding hoops. For instance, 10 feet will be enough for professional play.
• Attach the backboard and the rim
Once the pole is up, you will move on to fixing the backboard accordingly. For you to avoid exposing yourself to safety issues, it will be vital for you to raise this backboard with the help of other people. The rim and the net will then follow in that order.
As you look forward to having a Spalding basketball hoop in your backyard, it will always be vital to understand how to install it. As long as you fix it appropriately, you will have no reason to worry in the long run.
Spalding Inground Basketball Hoops Recommend


